I always forgot how to set the static IP address on Ubuntu systems, so I decide to write a post for me to easily review later. Let’s start with the following command to check the current interface and IP address:
ip a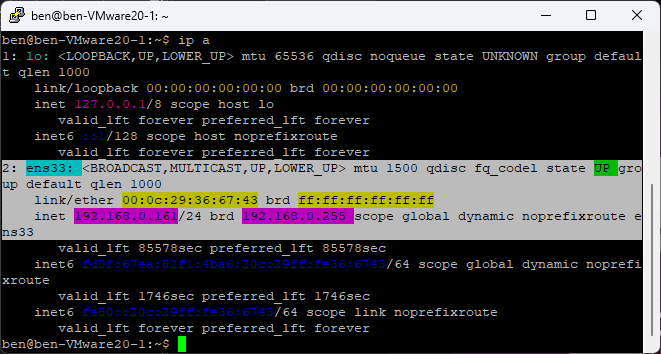
So we know adapter interface name that we need to change, we can proceed to next step.
Let’s check the existing if there is any netplan files
cd /etc/netplan
ls
I will prefer to start from scratch using a new file named: 01-netcfg.yaml
sudo nano 01-netcfg.yamlIn the editor, copy paste the formatting as below:
network:
  version: 2
  renderer: networkd
  ethernets:
    ens33:            # Change this to your interface name
      dhcp4: no
      addresses:
        - 192.168.0.15/24      # IPv4 & Mask (24 = 255.255.255.0)
      routes:
        - to: default
          via: 192.168.0.1      # Gateway
      nameservers:
        addresses: [8.8.8.8, 1.1.1.1]      # DNS
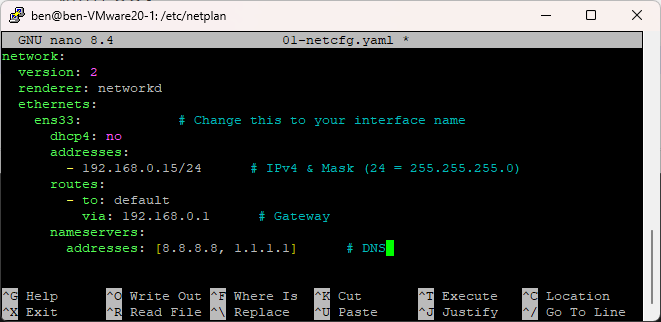
After done editing, we can press Ctrl + O to save the file and then Ctrl + X to quit the nano text editor.
Next, we need to set the appropriate permissions for the netcfg config file to prevent any warnings.
sudo chmod 600 /etc/netplan/01-netcfg.yaml
sudo netplan apply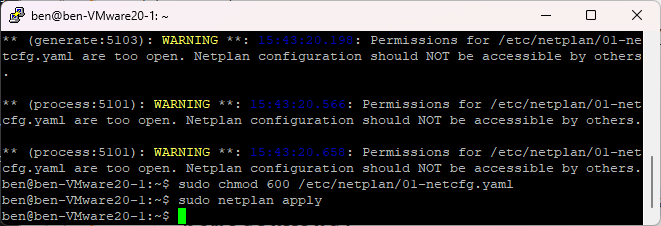
The 600 permission means:
6 (Owner): Read and Write permissions for root.
0 (Group): No permissions.
0 (Others): No permissions.
That’s it. 🙂