Even though Synology DSM supports creating and renewing SSL certificates via Let’s Encrypt, I already have a certificate set up for automatic renewal on another server. Rather than managing individual renewals across every Synology device, I’ve decided to reuse that existing one instead. To do this, I’ll use SCP to fetch the certificate from the remote server and apply it directly to my Synology NAS.
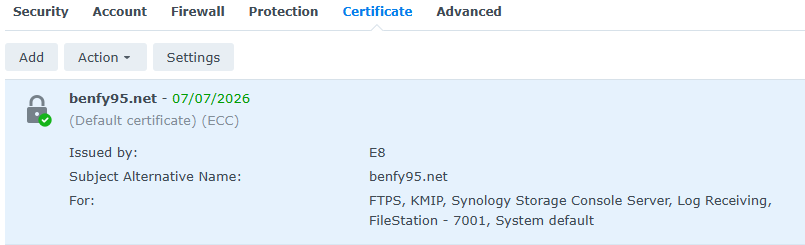
1. Verify that your default certificate is active and selected within the Control Panel.
2. Activate the Terminal Service option within the DSM Control Panel.
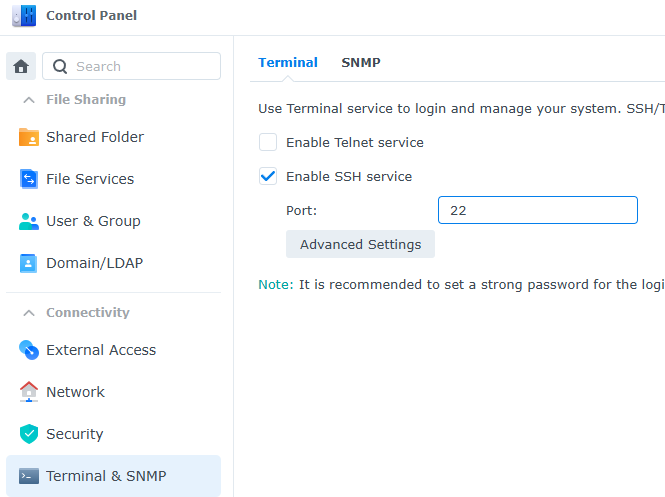
3. Connect to your Synology NAS by logging in with PuTTY or another SSH client.
Obtain root privileges on your Synology NAS, and generate SSH keys for connecting to a remote system; in this instance, my target server runs Ubuntu 24 LTS.
sudo -i
ssh-keygen -t rsa -b 4096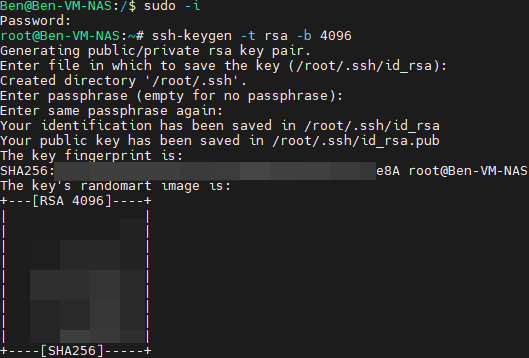
4. Once you have generated your SSH keys, proceed to log in by running the command below. Type YES to store the host fingerprint and simply press Enter to accept the default storage location for the key. Enter the remote password when prompted. For this example, I will be using the root account on my remote server.
ssh root@<your-ip>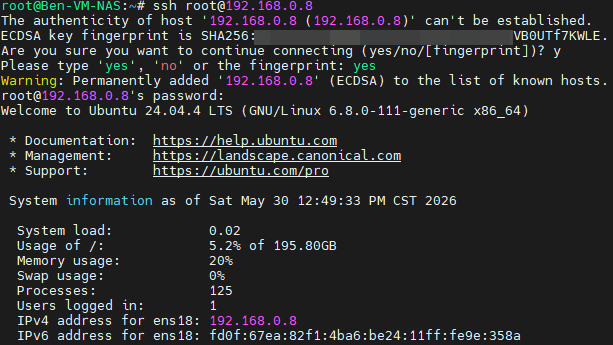
5. Once we’ve confirmed that signing in worked correctly, we can log out and activate the automatic or password-free login option.
logout6. Activate password-free access by re-entering your password for the remote server account.
cat ~/.ssh/id_rsa.pub | ssh root@<your-ip> "mkdir -p ~/.ssh && chmod 700 ~/.ssh && cat >> ~/.ssh/authorized_keys && chmod 600 ~/.ssh/authorized_keys"7. Log back into the server; you shouldn’t be prompted for a password anymore.
ssh root@<your-ip>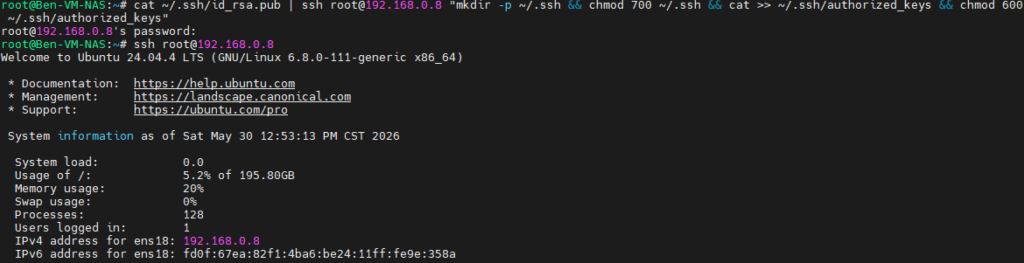
8. You may now close the SSH session since it is no longer needed. Within Synology DSM, navigate to Control Panel > Task Scheduler > Create > Scheduled Task > User-defined script
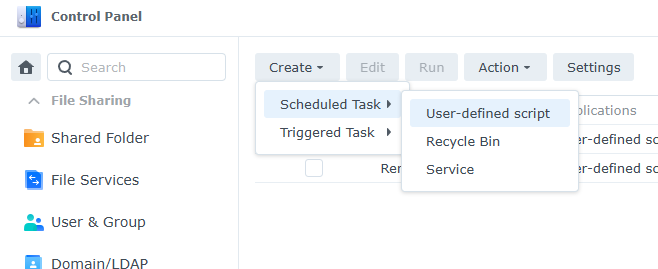
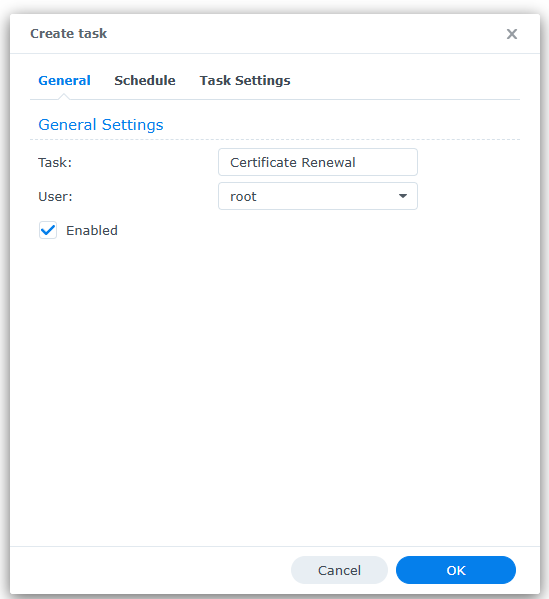
9. Set up a new task under any title of your choice, and configure it to execute the script as the root user.
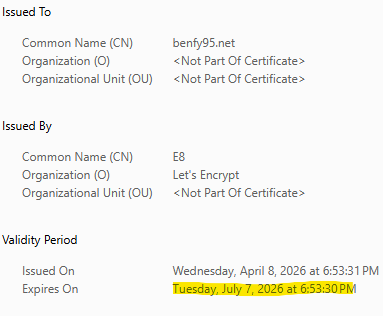
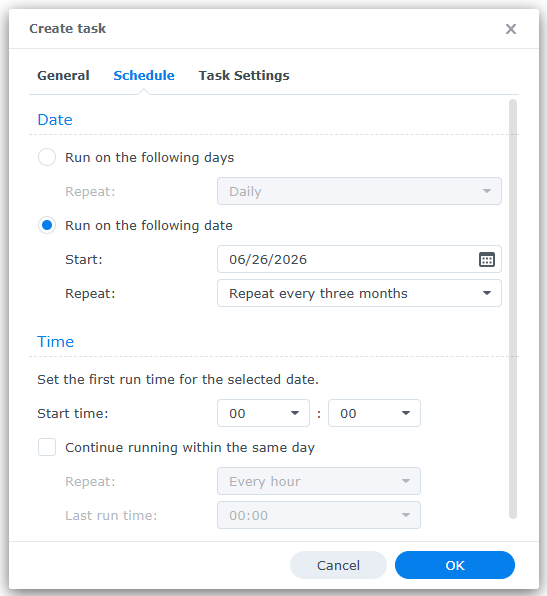
10. Within the Schedule tab, my Let’s Encrypt certificates are configured to expire every three months. Since the remote server automatically renews them once their validity drops below 30 days, I set Synology DSM to request a renewal roughly 10 or more days ahead of expiration. This ensures DSM consistently receives the updated certificate. Adjust this timing according to your own preferences.
11. Navigate to the Task Settings located in the Run command area and adjust any required options prior to inserting the script below. Provide your password to finalize the task creation.
- your-ip: IP address of remote server.
- dir-to-cert: Path to the certificate folder on remote server
- cert-name: Certificate name, can be whatever extension, crt, pem etc. eg: ssl.crt
- cert-key: Key file name, can be whatever extension, crt, pem etc. eg: ssl.key
#!/bin/bash

# --- CONFIGURATION ---
REMOTE_SERVER="root@<your-ip>"
REMOTE_PATH="<dir-to-cert>"
TEMP_DIR="/tmp/ssl_update"

# 1. Create a clean temporary directory
mkdir -p "$TEMP_DIR"

# 2. Securely pull the files from the remote server
scp "$REMOTE_SERVER:$REMOTE_PATH/<cert-name>" "$TEMP_DIR/cert.pem"
scp "$REMOTE_SERVER:$REMOTE_PATH/<cert-key>" "$TEMP_DIR/privkey.pem"

# 3. Verify files successfully downloaded before breaking anything
if [ ! -f "$TEMP_DIR/cert.pem" ] || [ ! -f "$TEMP_DIR/privkey.pem" ]; then
    echo "Error: Failed to fetch SSL files from remote server."
    exit 1
fi

# 4. Find Synology's real system default archive directory mapped in DSM
ARCHIVE_DIR=$(cat /usr/syno/etc/certificate/_archive/DEFAULT)
TARGET_PATH="/usr/syno/etc/certificate/_archive/$ARCHIVE_DIR"

# 5. Overwrite the certificates in Synology's real archive folder
cp "$TEMP_DIR/cert.pem" "$TARGET_PATH/cert.pem"
cp "$TEMP_DIR/privkey.pem" "$TARGET_PATH/privkey.pem"

# Also overwrite fullchain if it's required (using cert.pem as a baseline fallback)
cp "$TEMP_DIR/cert.pem" "$TARGET_PATH/fullchain.pem"

# 6. Copy files to the system default presentation directory
cp "$TEMP_DIR/cert.pem" /usr/syno/etc/certificate/system/default/cert.pem
cp "$TEMP_DIR/privkey.pem" /usr/syno/etc/certificate/system/default/privkey.pem
cp "$TEMP_DIR/cert.pem" /usr/syno/etc/certificate/system/default/fullchain.pem

# 7. Clean up the temp files
rm -rf "$TEMP_DIR"

# 8. Force Synology to reload Nginx and read the brand new certificates safely
/usr/syno/bin/synosystemctl restart nginx

echo "Synology SSL Certificate successfully updated and Nginx restarted!"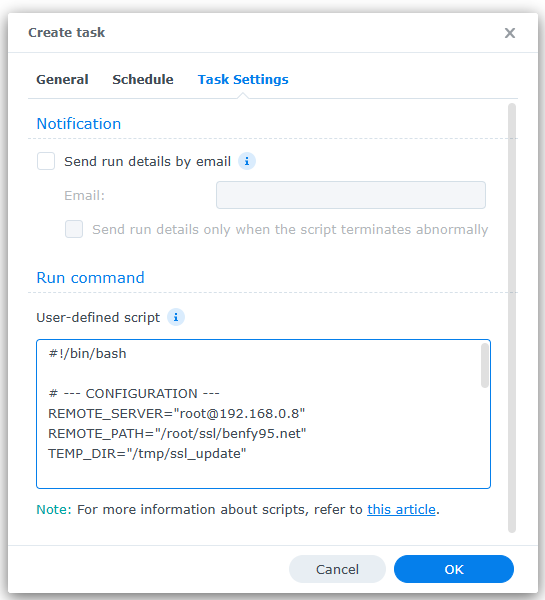
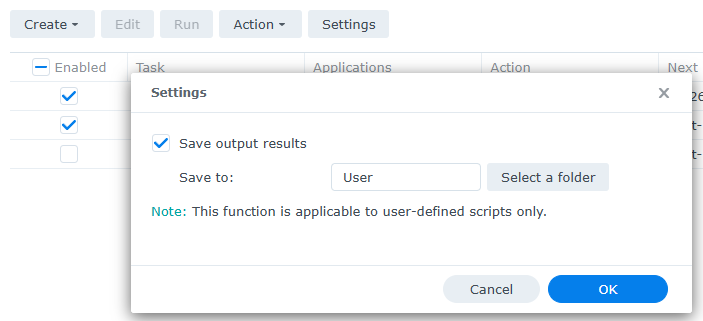
12. Within the Settings menu, it is advisable to store the generated log outputs in a designated folder.
13. (Optional) Dry-run the script. Adjust settings as needed, following the same process used earlier. This does not require a recurring execution, so you can delete it or disable its schedule once the task has been created.
#!/bin/bash

# --- CONFIGURATION ---
REMOTE_SERVER="root@<your-ip>"
REMOTE_PATH="<dir-to-cert>"
TEMP_DIR="/tmp/ssl_dry_run"

echo "=== STARTING SSL DRY RUN ==="

# 1. Create temporary directory
mkdir -p "$TEMP_DIR"

# 2. Pull the files
echo "Attempting to pull files from $REMOTE_SERVER..."
scp "$REMOTE_SERVER:$REMOTE_PATH/<cert-name>" "$TEMP_DIR/cert.pem"
scp "$REMOTE_SERVER:$REMOTE_PATH/<cert-key>" "$TEMP_DIR/privkey.pem"

# 3. Verify download
if [ ! -f "$TEMP_DIR/cert.pem" ] || [ ! -f "$TEMP_DIR/privkey.pem" ]; then
    echo "DRY RUN FAILURE: Could not pull files from remote server."
    exit 1
else
    echo "DRY RUN SUCCESS: Files successfully pulled to temporary directory."
fi

# 4. Find Synology's target directory
ARCHIVE_DIR=$(cat /usr/syno/etc/certificate/_archive/DEFAULT)
TARGET_PATH="/usr/syno/etc/certificate/_archive/$ARCHIVE_DIR"

echo "--------------------------------------------------"
echo "SIMULATED ACTIONS (No files are being modified):"
echo "-> Would copy certs to live archive: $TARGET_PATH/"
echo "-> Would copy certs to presentation: /usr/syno/etc/certificate/system/default/"
echo "-> Would run: /usr/syno/bin/synosystemctl restart nginx"
echo "--------------------------------------------------"

# 5. Clean up the temp files
rm -rf "$TEMP_DIR"
echo "=== DRY RUN COMPLETED CLEANLY ==="
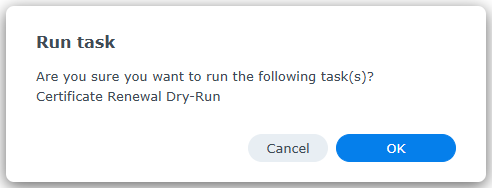
14. Select the Dry-Run task and then click Run.
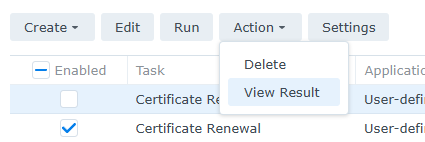
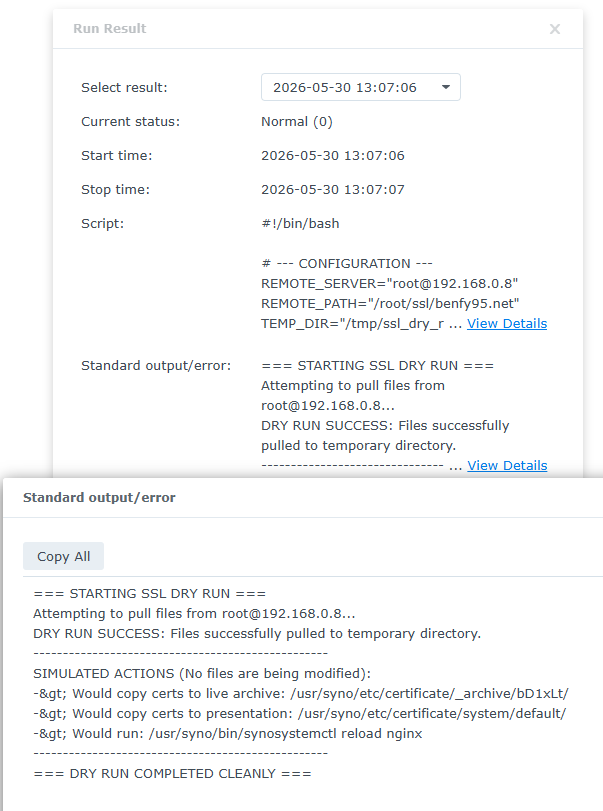
15. Once executed, we can examine the output. If everything runs successfully, we’re all set.
That’s it.